'Dev > Javascript' 카테고리의 다른 글

20 Best jQuery Slideshow / Photo Gallery Plugins  (0) 2012.02.29
Prototype에서 jQuery로 옮겨타기  (0) 2011.07.31
Firebug의 console 파헤치기.  (0) 2011.07.19
fireBug 사용법  (0) 2011.07.19
[jQuery] firebug로 디버그  (0) 2011.07.19
출처 : http://graphicalerts.com/20-best-jquery-slideshow-image-photo-gallery-plugins/

Photo Gallery, picture gallery, or slideshow are the best way to showcase your images / photos to your readers. This post is a showcase of 20 best jQuery slideshow / photo gallery plugins .

20 Best jQuery Slideshow / Photo Gallery Plugins

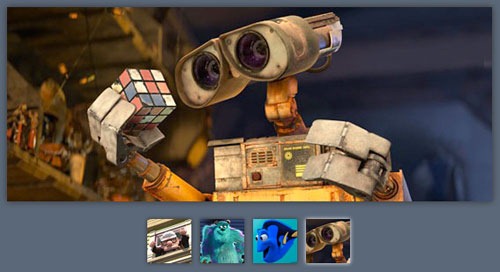
1. Galleria

jQuery slideshow

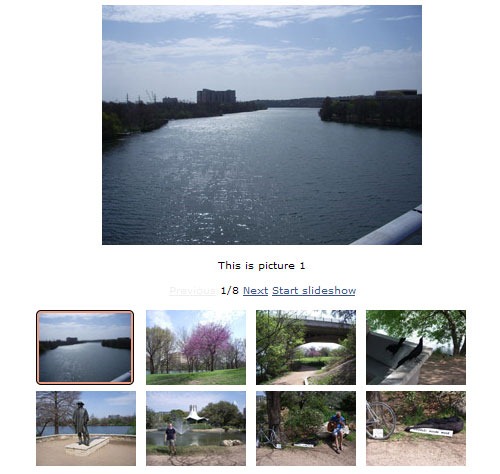
Galleria is a JavaScript image gallery unlike anything else. It can take a simple list of images and turn it into a foundation of multiple intelligent gallery designs, suitable for any project.

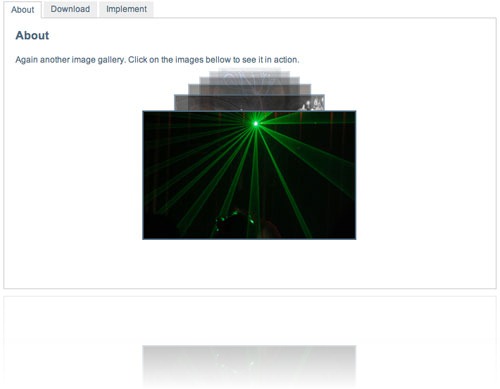
2. Galleriffic

jQuery slideshow

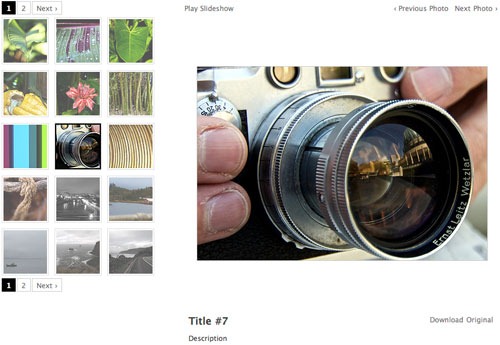
Galleriffic is a jQuery Slideshow plugin that provides a rich, post-back free experience optimized to handle high volumes of photos while conserving bandwidth.

3. Nivo Slider

jQuery slideshow

Nivo Slider is a lightweight jQuery Slideshow  plugin for creating good-looking image sliders.

4. Avia Slider

jQuery slideshow

AviaSlider is a jQuery Slideshow plugin with very unique transition effects.

5. Pikachoose

jQuery slideshow

Pikachoose is a lightweight Jquery plugin that allows easy presentation of photos with options for slideshows, navigation buttons, and auto play.

6. Image Flow

jQuery slideshow

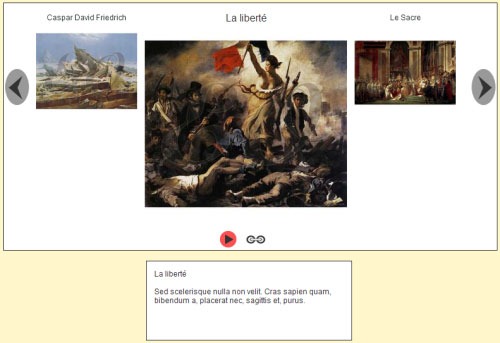
Image flow is inspired by Apple’s cover flow. The javascript renders the cover flow effect without any noticeable flaw.

7. SpaceGallery

jQuery slideshow

SpaceGallery is onother cool jQuery Slideshow plugin  display Your images.

8. jQuery Gallery Scroller

jQuery slideshow

jQuery Gallery Scroller (jqGalScroll) takes list of images and creates a smooth scrolling photo gallery scrolling vertically, horizontally, or diagonally.

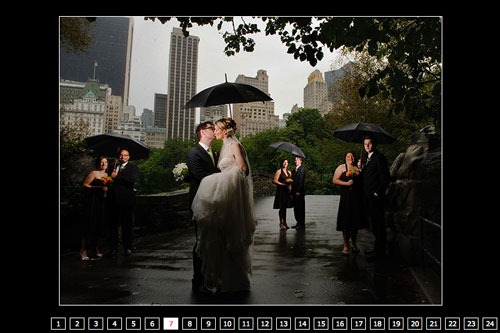
9. prettyPhoto

jQuery slideshow

jQuery Lightbox clone, pretty similar to original Lightbox with few another features and full documentation.

10. s3slider

jQuery slideshow

JQuery Slideshow with three different features and displaying sides, fully customizable sizes, delay speed and with good documentation.

11. GalleryView

jQuery slideshow

This is a cool jQuery Slideshow Plugin to show images as gallery

12. Supersized

jQuery slideshow

Supersized is an image gallery built by BuildInternet.com and it is able to slideshows the images with full screen.

13. EOGallery

jQuery slideshow

EOGallery is a web animated slideshow gallery made with jQuery.

14. PictureSlides

jQuery slideshow

PictureSlides is a plugin for jQuery, and it is a highly customizable JavaScript-based way to easily turn your images into a collection viewable as a slideshow, and with fading effects, if desired.

15. Pirobox

jQuery slideshow

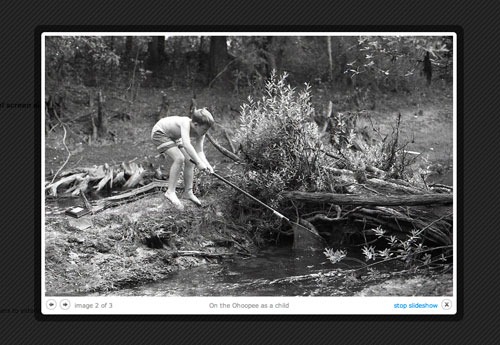
Pirobox is lightweight jQuery Lightbox script.

16. CrossSlide

jQuery slideshow

CrossSlide is a jQuery plugin implementing some common slide-show animations, traditionally only available via Adobe Flash™ or other proprietary plugins. CrossSlide builds upon jQuery’s animation facility, so it is as portable across browsers as jQuery itself (that is, a lot!)

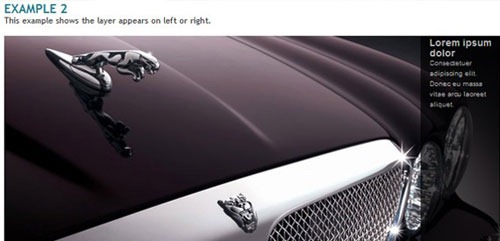
17. ColorBox

jQuery slideshow

18. Coin Slider

jQuery slideshow

jQuery Image Slider with Unique Effects.

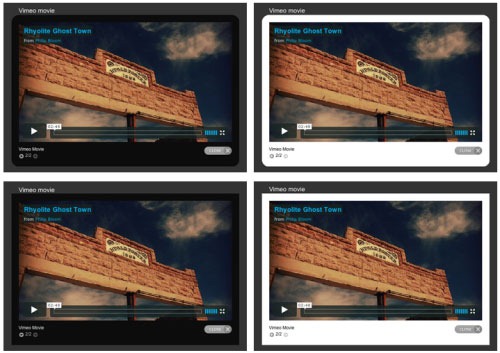
19. jQuery.popeye

jQuery slideshow

jQuery.popeye is an advanced image gallery script built on the JavaScript library jQuery.

20. Smoot Div Scroll

jQuery slideshow

Smooth Div Scroll is a jQuery plugin that scrolls content horizontally left or right. Apart from many of the other scrolling plugins that have been written for jQuery, Smooth Div Scroll does not limit the scroling to distinct steps. As the name of the plugin hints, scrolling is smooth.

Related posts:

  1. 20 Awesome jQuery Lightbox Plugins Share jQuery is a powerful tool in the hands of developers and some even call it a flash killer as...
  2. 25 Beautiful Examples of CSS and jQuery Drop down Menu Tutorials Share Here you will find 25 high quality CSS and jQuery drop down menu examples or just multi level menu...
  3. 21 Best jQuery Tooltip Plugins, Demos, Examples & Tutorials Share Today we are posting some attractive, Handy and useful jquery Tooltip plugins for your new projects. If the tooltip...
  4. 50 best photoshop photo effects tutorials Share I’ve collected 50 best Photoshop photo effects tutorials that will inspire and help you to master Photoshop photo effects...
  5. 40 Beautiful Examples of Ajax CSS forms styling Share Forms are an important part of every website. It can be as simple as getting subscribed to website RSS...

'Dev > Javascript' 카테고리의 다른 글

jquery slideshow  (0) 2012.02.29
Prototype에서 jQuery로 옮겨타기  (0) 2011.07.31
Firebug의 console 파헤치기.  (0) 2011.07.19
fireBug 사용법  (0) 2011.07.19
[jQuery] firebug로 디버그  (0) 2011.07.19
jQuery는 겸손한(unobtrusive) 자바스크립트를 위한 자바스크립트 라이브러리다. jQuery는 태생적으로 BDD(Behavior driven development) 방법론을 지향하고 CSS 셀렉터를 사용하여 HTML 문서를 훓는 방법(traversing)에 기반한다. 반면에 Prototype은 태생적으로 CDD(Class driven development)를 지향하고 쉽게 자바스크립트 개발할 수 있도록 해준다. Prototype 라이브러리Ruby on Rails에서 아주 잘 지원되고 많은 헬퍼 함수들을 가지고 있다.

- 내가 Prototype에서 jQuery로 옮긴 이유 중에서...
jQuery.js에서 $()를 호출할때마다 거대한 jQuery객체를 만들어내지는 않는다. jQuery 객체들은 prototype-based-inheritance를 통해서 jQuery를 상속받은 클론들이다. 이런 클론들은 delegation pointer를 가지고 원본(prototype)의 property와 method들을 참조하기 때문에 무겁지 않다.

- Prototype vs jQuery 중에서...

Prototype기반으로 만들어진 프로젝트를 jQuery로 옮기고 있습니다. jQuery로 만들어진 것을 Prototype용으로 컨버전(conversion) 하는 작업은 간간히 해 왔지만 이런 경우는 처음이네요. 위와 같은 이유들도 있겠지만 조금 더 보태자면 야속하게도 약 9개월 동안 이렇다 할 업데이트가 이루어지지 않는 것과 지금은 jQuery가 대세이기 때문이기도 합니다. 요즘 배포되는 자바스크립트 플러그인들을 보면 대부분이 jQuery기반이라 것을 눈여겨 보지 않아도 알 수 있을 정도입니다. Prototype에서 jQuery로 컨버전하는 동안 주요한 변경내역을 기록해 보았습니다. 참고로 처음에 위치한 코드가 Prototype이고 아래쪽에 위치한 것이 jQuery의 코드입니다.

DOM selector

$('element'); //=> DOM element object 
$('#element'); //=> jQuery(Array-like Object) object

$('element'); //=> DOM element object
$('#element').get(0); //=> DOM element object

$('element1','element2','element3'); //=> Array
$('#element1,#element2,#element3'); //=> jQuery object

element.down('div.item'); //=> DOM element object
element.children('div.item'); //=> jQuery object

element.up('div.contents'); //=> DOM element object
element.parent('div.contents'); //=> jQuery object

element.up('div.container'); //=> DOM element object
element.parents('div.container:first'); //=> jQuery object

element.next('div.item'); //=> DOM element object
element.next('div.item'); //=> jQuery object

element.previous('div.item'); //=> DOM element object
element.prev('div.item'); //=> jQuery object

element.select('div.item'); //=> Array
element.find('div.item'); //=> jQuery object

$('element').select('input[type="button"]'); //=> Array
$('#element input[type=button]'); //=> jQuery object

$$('#element a[href=#]')[0]; //=> DOM element object
$('#element a[href=#]')[0]; //=> DOM element object

element.select('input.cancel', 'input.submit', 'a.close'); //=> Array
element.find('input.cance,linput.submit,a.close'); //=> jQuery object

element.nextSiblings('div.item'); //=> Array
element.nextAll('div.item'); //=> jQuery object

element.previousSiblings('div.item'); //=> Array
element.prevAll('div.item'); //=> jQuery object
초반에 가장 이해하기 힘든것이 DOM 선택자였는데, '$'가 마치 오퍼레이터(operator) 처럼 사용되는 것은 비슷합니다. Prototype의 '$'는 보통 document.getElementById의 대역으로 사용되며, Element.prototype의 메서드들을 상속시키는 역할인 반면 jQuery의 '$'는 CSS 선택자와 동일한 룰을 가지고 있으며, Prototype의 select 메서드를 혼용하거나 $$유틸리티를 사용하는 효과가 발생합니다. 단순히 선택 방법만 틀린것이 아니라 처리방법 역시 다릅니다. jQuery의 '$'선택자에 의해 선택된 DOM 요소들은 배열화된 객체(Array-like Object)로 관리되는데 이것을 보통 'jQuery 객체'라고 부르더군요. jQuery에서 제공하는 여러 체인 메서드들은 jQuery 객체화한 다음에야 비로소 혼용될 수 있습니다. 만약, Prototype과 마찬가지로 DOM 요소를 반환하게 하려면 'jQuery 객체에 get(0)' 또는 '[0]'을 사용해야 합니다. 이 것은 더이상 체인 메서드를 사용할 수 없는 상태가 되기 때문에 '$'를 다시 호출하는 등 사용성 및 가독성을 떨어트릴 수 있으므로 가급적이면 변수에 할당하여 사용하거나 체인 메서드로 모두 처리할 것을 권장하고 있습니다.

Prototype의 'down'과 'up'에 해당하는 'children'과 'parent'메서드는 서로 차이를 보입니다. Prototype의 경우 자식/부모 노드들을 순차적으로 검색하여 발견되는 첫번째 노드를 반환하는 반면, jQuery는 첫번째 자식/부모 노드중에서 일치하는 것만을 찾아 반환합니다. 때문에 이를 대체하기 위해서는 때때로 'find'와 'parents'메서드를 혼용해야 할 필요가 있습니다.

Event

var expand = function(event) { 
event.element(); //=> DOM element object
event.target; //=> DOM element object

event.pointerX(); //=> absolute horizontal position for a mouse event
event.clientX; //=> absolute vertical position for a mouse event

event.pointerY(); //=> absolute horizontal position for a mouse event
event.clientY; //=> absolute vertical position for a mouse event

event.stop(); // stop bubbling
event.stopPropagation(); // stop bubbling
};


element.observe('mouseup', expand); //=> DOM element object
element.bind('mouseup', expand); //=> jQuery object

document.observe('dom:loaded', expand); //=> document object
$(document).ready(expand); //=> jQuery object

element.stopObserving('mouseup', expand); //=> DOM element object
element.unbind('mouseup', expand); //=> jQuery object

element.observe('click', expand); //=> DOM element object
element.click(expand); //=> jQuery object
Prototype에 익숙한 사용자라면 bind가 눈에 띨 것입니다. jQuery에서 bind는 Prototype의 observe와 동일한 메서드로 볼 수 있습니다. 이 밖에도 jQuery는 편이성을 위해 jQuery 객체에 체인되는 이벤트 메서드들(keypress, mouseover, dblclick 등)을 제공하고 있습니다.

Element

element.remove(); //=> removed DOM element object 
element.remove(); //=> removed jQuery object

var img = new Element('img',{src:'/images/sample.gif',id:'my-img',alt:'img'}); //=> DOM element object
var img = $('<img src="/images/sample.gif" id="my-img" alt="img">'); //=> jQuery object

var el= new Element('a',{href:'http://firejune.com',className:'link'}).update('ClickMe!'); //=> DOM element object
var el = $('<a href="http://firejune.com" class="link">').html('ClickMe!'); //=> jQuery object

element.update('<p>hello!</p>'); //=> DOM element object
element.html('<p>hello!</p>'); //=> jQuery object

element.insert({top:img}); //=> DOM element object
element.prepend(img); //=> jQuery object

element.insert({bottom:'<p>hello!</p>'}); //=> DOM element object
element.append('<p>hello!</p>'); //=> jQuery object

element.insert({before:el}); //=> DOM element object
element.before(el); //=> jQuery object

element.insert({after:'<p>hello!</p>'}); //=> DOM element object
element.after('<p>hello!</p>'); //=> jQuery object
DOM 요소를 파싱할 때 주로 다루게 되는 메서드들입니다. jQuery에서는 DOM 요소의 선택자로 사용되는 '$'를 그대로 재사용하여 엘리먼트를 생성하는 모습은 매우 인상적입니다.

Style

element.setStyle({width: '100px'}); //=> DOM element object 
element.css({width: 100}); //=> jQuery object

element.getStyle('width'); //=> '100px'
element.css('width'); //=> '100px'

element.getWidth(); //=> 100
element.width(); //=> 100

element.getHeight(); //=> 100
element.height(); //=> 100

element.hide(); //=> DOM element object
element.hide(); //=> jQuery object

element.show(); //=> DOM element object
element.show(); //=> jQuery object

element.addClassName('active'); //=> DOM element object
element.addClass('active'); //=> jQuery object

element.removeClassName('active'); //=> DOM element object
element.removeClass('active'); //=> jQuery object

element.hasClassName('active'); //=> DOM element object
element.hasClass('active'); //=> jQuery object

element.toggleClassName('active'); //=> DOM element object
element.toggleClass('active'); //=> jQuery object
엘리먼트 스타일과 관련해서는 서로 비슷한 양상을 보이지만, jQuery의 경우 'css'메서드를 통해서 스타일을 부여하는 것과 값을 읽어내는 것이 동시에 이루어지고 있다는 점에서 차이가 있습니다.

Enumerable

elements.each((function(element, index) { 
//=> DOM element object, index
});
elements.each(function(index, element) {
//=> DOM element object, index
});


elements.invoke('remove');
elements.remove();
배열 객체를 다루는데에는 두말할 나위 없이 jQeury가 10점 만점에 10점입니다. 단, Prototype과 달리 jQuery에서 each를 사용할 때 주의할 점은 index와 반환요소의 순서가 뒤바뀐 것 입니다.

Ajax

var form = $(formElement); 


new Ajax.Request(form.action, {
method: form.method, paramitors: form.serialize(),
onSuccess: function(transport) {
//=> transport object(Text or JSON or XML)
},
onFailure: function(transport) {},
onComplete: function(transport) {}
});


$.ajax({
url: form.get(0).action, type: form.get(0).method, data: form.serialize(),
success: function(transport) {
//=> transport string or json object or xml node
},
error: function(transport) {},
complete: function(transport) {}
});
응답해더의 'content-type'에 따라 결과물을 자동으로 분석하여 반환하는 Ajax로직은 서로 닮았습니다만, jQuery의 경우는 응답결과에 따라 자료형이 변경되어 넘어오는 반면, Prototype은 transport객체에 모든 상황이 반영되어 넘어옵니다.

Effect

element.fade({duration: 0.5}); // => instance of effect 
element.fadeOut(500); //=> jQuery object

element.appear({duration: 0.5}); // => instance of effect
element.fadeIn(500); //=> jQuery object

element.slideUp({duration: 0.5, afterFinish: callback}); // => instance of effect
element.slideUp(500, callback); //=> jQuery object

element.slideDown({duration: 0.5, afterFinish: callback}); // => instance of effect
element.slideDown(500, callback); //=> jQuery object


element.morph({
style: 'width: 100px; height: 100px; opacity: 0.5;',
duration: 0.5,
transition: Effect.Transitions.linear,
afterFinish: callback
}); // => instance of effect

element.animate(
{width: 100, height: 100, opacity: 0.5}, // style properties
500, // duration
'linear', // easing
callback
); //=> jQuery object
jQuery는 Scriptaculous의 effect.js를 포함해야 지만 가능한 몇몇 애니메이션 효과를 추가작업 없이 사용할 수 있습니다. 애니메이션 코어를 내장하고 있기 때문입니다. 1차원적인 계산에서 그치는 Scriptaculous의 transition과는 달리 jQuery의 easing은 p, n, firstNum, diff 총 4개의 인자로 구성되는 계산식은 매우 독창적인 변화를 만들어 낼 수 있는 구조를 가지고 있습니다. 그리고 jQuery에는 Scriptaculous를 대신하는 ui.js가 있습니다. 다수의 UI 컴포넌트와 효과들로 구성되어 있으며, 메서드 단위로 파일이 나뉘어 있습니다.

Browser detection

Prototype.Browser.IE; //=> true or false 
$.browser.msie; //=> true or false

Prototype.Browser.Webkit; //=> true or false
$.browser.safari; //=> true or false


Prototype.Browser.Gecko; //=> true or false
$.browser.mozilla; //=> true or false

Prototype.Browser.Opera; //=> true or false
$.browser.opera; //=> true or false
jQuery쪽이 더욱 간결해 보이네요.

jQuery를 사용할 때 가장 만족스러운 점은 싱글 혹은 멀티플 노드의 개념을 떨쳐 버림으로서 찾아오는 강력한 체인 메서드의 연결입니다. 익숙해 지기만하면 상당히 빠른 속도로 코딩을 작렬(?)할 수 있을 것으로 기대되지만, 역시 Prototype의 Class와 bind(Function.prototype)를 혼용한 OO 클래스 지향 코딩을 구사할 수 없다는 것이 무척이나 아쉬운 점으로 남습니다. 그래서, Prototype의 쓸만한 코드들을 훔쳐 쓰려고 마음먹고 있죠.

* 이 문서는 지속적으로 업데이트 될 예정입니다.

출처 : http://firejune.com/
'Dev > Javascript' 카테고리의 다른 글

jquery slideshow  (0) 2012.02.29
20 Best jQuery Slideshow / Photo Gallery Plugins  (0) 2012.02.29
Firebug의 console 파헤치기.  (0) 2011.07.19
fireBug 사용법  (0) 2011.07.19
[jQuery] firebug로 디버그  (0) 2011.07.19
웹개발자나 FT개발자는 기본적으로 Firefox나 Chrome을 기본 브라우져로 사용하는 경우가 많다.
일단 빠르고 (파폭은 쫌 느림;) 다양한 Extensions이 존재하기 때문인데, 그 중에서도 개발을 위해선 Extionsions 중 firebug를 빼먹을순 없다.

오늘은 강력한 firebug의 기능 중 console에 대해서 자세히 살펴보려 한다.

1. console.log(object[, object, ...])
script내 단순 메세지 출력을 위해 사용.

1
2
3
4
5
6
7
8
9
10
<SCRIPT type=text/javascript>
var str = "콘솔 테스트";
var num = 1;
var num1 = 2;
var num2 = 1;
console.log(str);
console.log(num);
console.log("지금 하는건 %s. 번호는 %d", str, num);
</SCRIPT>

결과 :


2. console.debug(object[, object, ...])
console.log()와 동일하나 추가적으로 실행라인이 표시됨.

1
2
3
4
5
6
7
8
9
10
<SCRIPT type=text/javascript>
var str = "콘솔 테스트";
var num = 1;
var num1 = 2;
var num2 = 1;
console.debug(str);
console.debug(num);
console.debug("지금 하는건 %s. 번호는 %d", str, num);
</SCRIPT>

결과 :


3. console.info(object[, object, ...])
console.debug()와 동일하고 앞에 Info를 가르키는 아이콘이 출력된다. (배경색 : 시원한 파란색)

1
2
3
4
5
6
7
8
9
10
<SCRIPT type=text/javascript>
var str = "콘솔 테스트";
var num = 1;
var num1 = 2;
var num2 = 1;
console.info(str);
console.info(num);
console.info("지금 하는건 %s. 번호는 %d", str, num);
</SCRIPT>

결과 :


4. console.warn(object[, object, ...])
console.debug()와 동일하고 앞에 warning을 가르키는 아이콘이 출력된다. (배경색 : 불안한 노란색)

1
2
3
4
5
6
7
8
9
10
<SCRIPT type=text/javascript>
var str = "콘솔 테스트";
var num = 1;
var num1 = 2;
var num2 = 1;
console.warn(str);
console.warn(num);
console.warn("지금 하는건 %s. 번호는 %d", str, num);
</SCRIPT>

결과 :


5. console.error(object[, object, ...])
console.debug()와 동일하고 앞에 error를 가르키는 아이콘이 출력되고 에러난 부분의 메세지가 출력된다. (배경색 : 에러의 빨간색)

1
2
3
4
5
6
7
8
9
10
<SCRIPT type=text/javascript>
var str = "콘솔 테스트";
var num = 1;
var num1 = 2;
var num2 = 1;
console.error(str);
console.error("이건 num 변수다.", num);
console.error("지금 하는건 %s. 번호는 %d", str, num);
</SCRIPT>

결과 :


6. console.assert(expression[, object, ...])
조건을 입력하고 출력할 텍스트를 입력하면 해당 조건이 통과하였을경우 Console창에 출력되지 않고 통과하지 못하였을땐 Console에 출력된다.

1
2
3
4
5
6
7
8
<SCRIPT type=text/javascript>
var num = 1;
var num1 = 2;
console.assert(num == 2, "num은 2?");
console.assert(num > num1, "num > num1 이건 통과?");
console.assert(num < num1, "num < num1 이건 통과?");
</SCRIPT>

결과 :


7. console.dir(object)
인자로 넘어간 개체에 대해 모든 프로퍼티와 값들을 출력한다. (HTML 마크업을 넘기면 Dom Tree 출력)

1
2
3
4
5
6
7
8
9
10
11
12
13
14
15
16
17
<DIV id=division class=division>
test division
</DIV>
<SCRIPT type=text/javascript>
console.dir(document.getElementById("division"));
var objGirl = {
Name: "Test",
Eyes: "Brown",
BestQualities:
[
"Smile",
"Laugh"
]
};
console.dir(objGirl);
</SCRIPT>

결과 :


8. console.dirxml(node)
인자로 넘어온 노드에 대한 소스(innerHTML)를 출력한다.

1
2
3
4
5
6
7
<DIV id=division class=division>
test division
</DIV>
<SCRIPT type=text/javascript>
console.dirxml(document.getElementById("division"));
</SCRIPT>

결과 :


9. console.trace()
자바스크립트가 최초 실행된 순간부터 console.trace를 만날때까지의 실행 정보를 출력한다.

1
2
3
4
5
6
7
8
9
10
<A onmouseover=mouseover(); onmouseout=console.trace(); onclick=click(); href="#">Trace Test</A>
<SCRIPT type=text/javascript>
function click() {
console.trace();
}
function mouseover() {
console.trace();
}
</SCRIPT>

결과 :


10. console.group(object[, object, ...]), console.groupEnd()
그룹을 생성하여 그룹별로 log를 출력할수 있게 해준다. groupEnd는 group()을 열어줬으면 반드시 닫아주는 코드도 삽입해야한다.
그리고 console.groupCollapsed()는 group()과 기능은 동일하나 Default가 접혀있는 상태이다.

1
2
3
4
5
6
7
8
9
10
11
12
13
14
15
<SCRIPT type=text/javascript>
var str = "콘솔 테스트";
console.group("기본적으로 펼쳐짐!!");
console.log(str);
console.log("console");
console.warn("warning");
console.groupEnd();
console.groupCollapsed("기본적으로 접혀짐!!");
console.log(str);
console.log("console");
console.warn("warning");
console.groupEnd();
</SCRIPT>

결과 :


11. console.time(name), console.timeEnd(name)
실행 시간을 체크하길 원하는 function이나 구문을 감싸면 실행 시간을 출력해준다.
console.time()을 열었으면 반드시 console.timeEnd()로 닫아줘야 한다.

1
2
3
4
5
6
7
8
9
10
<SCRIPT type=text/javascript>
console.time("while test");
var i = 100000;
while (i--){
if( 100 > i ) {
}
}
console.timeEnd("while test");
</SCRIPT>

결과 :


12. console.profile([title]), console.profileEnd()
자바스크립트 프로파일러를 실행한다. profile()로 연 순간부터 profileEnd()를 만날때까지 실행한 모든 스크립팅에 대한 시간(고유시간, 시간, 평균, 최소, 최대)와 호출횟수, 전체 실행 평균 퍼센트를 출력한다. console.profile()을 열었으면 반드시 console.profileEnd()로 닫아줘야한다.

1
2
3
4
5
6
7
8
9
10
11
12
13
14
15
16
17
18
19
20
21
<SCRIPT type=text/javascript>
console.profile("profile test");
function abc() {
var i = 1000;
while (i--) {
//block
}
return i;
}
function def() {
for (var i = 0; i < 1000; i++) {
//block
}
return i;
}
abc();
def();
console.profileEnd();
</SCRIPT>

결과 :


13. console.count([title])
실행한 횟수 만큼 count를 집계하여 출력해준다. 이때 title이 동일하다면 title별로 count를 더하여 보여준다.

1
2
3
4
5
6
7
8
<SCRIPT type=text/javascript>
console.count("난 실행될때마다 Count증가. 그래서 Count는?");
var i = 1000;
while (i--) {
console.count("여기 Count는?");
}
console.count("난 실행될때마다 Count증가. 그래서 Count는?");
</SCRIPT>

결과 :


14. console.exception(error-object[, object, ...])
try ~ catch에서 catch의 error 객체를 인자로 넘기면 에러 메세지를 자세히 출력해준다.

1
2
3
4
5
6
7
8
9
10
11
12
<SCRIPT type=text/javascript>
function zzz() {
try {
var a = 0;
var c = b * 10;
}
catch (e) {
console.exception(e);
}
}
zzz();
</SCRIPT>

결과 :


15. console.table(data[, columns])
Array나 Object등 형태의 가공된 데이터를 table 형태로 출력해준다.

1
2
3
4
5
6
7
8
9
10
11
<SCRIPT type=text/javascript>
var arr = [1, 2,3 ];
console.table(arr);
var obj = [
{city:"서울", eng:"Seoul"},
{city:"제주", eng:"Jeju"},
{city:"부산", eng:"Busan"}
];
console.table(obj);
</SCRIPT>

결과 :

'Dev > Javascript' 카테고리의 다른 글

20 Best jQuery Slideshow / Photo Gallery Plugins  (0) 2012.02.29
Prototype에서 jQuery로 옮겨타기  (0) 2011.07.31
fireBug 사용법  (0) 2011.07.19
[jQuery] firebug로 디버그  (0) 2011.07.19
Javascript 배열 메서드  (0) 2011.04.29
자바스크립트를 사용하다 보니 디버깅시 alert으로만 하기에는 너무 고된 길이 예상되어서
fireBug사용법을 검색하여 보았습니다.

역시 구글에 없는 내용은 없더군요^^
아래 사이트에 기본적인 내용이 잘 정리된 것 같습니다.

console.log보기
로그 레벨에 따라 info, debug, error, log중에서 골라서 사용하면 된다.


파이어 폭스에서 이렇게 보임.


코드 실행에 걸리는 시간체크하기
console.time으로 시작을 알리고 테스트 코드를 넣은 후 console.timeEnd()로 닫아준다.
함수단위도 체크가 가능한지 함수 이름을 넣어봤지만 안되더군요.


결과화면


프로파일 명령 사용 코드
while문과 for문을 실행하는 프로파일을 만들어 봤습니다.
console.profile()로 시작하고 마지막에 console.profileEnd()를 사용하면 됩니다.


프로파일 결과
호출 횟수, 시간, 평균시간 등등 코드에 대한 프로파일 분석결과가 화면에 표시됩니다.

크롬에서도 log, profile등은 지원이 되는 것 같더군요.
이 외에도 commandAPI를 이용해 console창에서 돔요소를 탐색하는 기능이 있는데
이 부분은 다음에 기회되면^^

출처 : http://chaospace.tistory.com/

책 ( jQuery Cookbook ) 을 읽다가 알게된 파이어폭스에서

제대로된 객체가 선택되었는지 확인하는 방법입니다. ㅋㅋ


왠만한 분들 다 아시겠지만;; 전 처음 안거라 신기해서 ㅋㅋ

파이어폭스 사용하여 개발하신 분이라면 다들 아시겠지만,

firebug 라고 디버그 해주는 기능을 다 아시리라 믿습니다~

모르시면
도구 > 부가기능 > 검색 해보시면 나와요~ 설치하시면 디버그 하실 수 있습니다~


이제 중요부분을 말하자면,

상당히 짧아서 서론을 일부러 길게 쓴....

아래는 사용 방법 입니다!~

var $test = $('.test'); // test 라는 클래스 명으로 된 모든 걸 가져옴.
console.log($test); // 파이어폭스 firebug 에 콘솔 이라는 곳에 가져온 test 를 찍습니다.
// 제대로 못 찍으면 잘 못 됐다는 거겠지요?


## 제대로 가져왔을 경우

## 가져오지 못 했을 경우


본인은 제대로 했는데 원활히 수행되지 않거나 에러도 나지 않을 경우에

유용하게 사용할 수 있을 거 같습니다.!!


모르셨던 분들에게 도움이 되셨길!~ ㅋㅋ

다른 것도 아는 것 있으면 공유합시다~~~

방문자가 별로 없어서 널리 퍼지진 않겠지만;;; 쿨럭쿨럭;;


도움이 되셨으면 하단 추천 버튼 혹은 광고 를 눌러주시는 것도 좋습니다.!!
많은 사람들이 볼 수 있도록 해주세요!~~


출처 : http://dokeby.tistory.com/
Javascript Array클래스에 정의되어있는 배열 메서드에 대하여 알아보자.

join()
Array.join()메서드는 배열의 모든 원소를 문자열로 변환하고 이어 붙여서 반환한다.

var a = [1, 2, 3];     //3개의 원소를 가진 배열을 생성
var s = a.join();      //s == "1,2,3"
s = a.join(", ");       //s == "1, 2, 3"

Array.join() 메서드는 String.split() 메서드와 반대되는 기능을 한다.

reverse()
Array.reverse() 메서드는 이름에서도 알 수 있듯이 배열 안의 원소 순서를 반대로 정렬하여 반환한다.

var a = new Array(1,2,3);     // a[0] = 1, a[1] = 2, a[2] = 3
a.reverse();                       // now a[0] = 3, a[1] = 2. a[2] = 1
var s = a.join();                  // s == "3,2,1"

sort()
Array.sort() 메서드는 배열 안의 원소들을 정렬하여 반환한다.

var a = new Array("c", "a", "b");
a.sort();
var s = a.join(", ");     // s== "a, b, c"

알파벳순이 아니라 다른 순서로 배열을 정렬하려면 sort() 메서드의 전달인자를 통해 비교 함수를 직접 명시해주어야 한다. 비교 함수는 전달인자를 두개 받아서, 정렬된 배열 상에서 어떤 것이 먼저 나타나야 하는지 판단하는데 사용 된다. 만약 첫 번째 전달인자가 두 번째보다 먼저 나타나야 한다면 비교 함수는 0보다 작은 숫자를 반환해야 한다. 첫 번째 전달인자가 두 번째보다 뒤에 나타나야 한다면 0보다 큰 숫자를 반환하며 두 값이 동등하다면 0을 반환해야 한다.
var a = [33, 4, 1111, 222];
a.sort();                   // 알파벳순 : 1111, 222, 33, 4
a.sort(function(a,b) { // 번호순 : 4, 33, 222, 1111
     return a-b;
     });

concat()
Array.concat() 메서드는 본래 배열의 모든 원소에 concat() 메서드의 전달인자들을 전부 이어붙인 배열을 새롭게 생성하여 반환한다.
var a = [1, 2, 3];
a.concat(4, 5);            // [1,2,3,4,5]
a.concat([4,5]);          // [1,2,3,4,5]
a.concat([4.5], [6,7]); // [1,2,3,4,5,6,7]
a.concat([4, [5,[6,7]]]);  // [1,2,3,4,5,[6,7]]

slice()
Array.slice() 메서드는 배열의 일부분 혹은 부분 배열을 반환한다.
var a = [1,2,3,4,5];
a.slice(0, 3);           // [1,2,3]
a.slice(3);              // [4,5]
a.slice(1, -1);         // [2,3,4]
a.slice(-3,-2);        // [3] 

splice()
Array.splice() 메서드는 배열에 원소를 삽입하거나 원소를 제거하려 할 때 범용적으로 사용할 수 있는 메서드이다.
var a = [1,2,3,4,5,6,7,8];
var a.splice(4);          // [5,6,7,8] , a는 [1,2,3,4];
var a.splice(1,2);       // [2,3] , a는 [1,4];
var a.splice(1,1);       // [4] , a는 [1]

push() & pop()
위 메서드를 사용하면 배열을 마치 스택인 것처럼 조작할 수 있다.
push() 메서드는 하나 혹은 그 이상의 원소들을 배열의 끝 부분에 이어 붙이고 배열의 새로운 길이를 반환한다.
pop() 메서드는 push()와 반대로 작동한다. 즉 pop() 메서드는 배열의 마지막 원소를 제거하고 배열의 길이를 감소시킨 후 배열에서 제거한 원소를 반환한다.
var stack = [];           // stack:[]
stack.push(1,2);        // stack:[1,2]        2를 반환
stack.pop();              // stack:[1]          2를 반환
stack.push(3);           // stack:[1,3]       3를 반환
stack.pop();              // stack:[1]          3를 반환
stack.push(4,5);        // stack:[1, [4,5]] 2를 반환
stack.pop();              // stack:[1]          [4,5]를 반환
stack.pop();              // stack:[]           1를 반환

unshift() & shift()
push(), pop()과 유사하며 이 메서들은 배열의 끝이 아니라 배열의 맨 앞에 원소를 삽입하고 제거한다.
var a = [];              // a:[]
a.unshift(1);           // a:[1]
a.unshift(22);          // a:[22, 1]
a.shift();                 // a:[1]
a.unshift(3,[4,5]);    // a:[3,[4,5],1]
a.shift();                 // a:[[4,5],1]
a.shift();                 // a:[1]
a.shift();                 // a:[]


Posted by 빵군

이미지 파일 첨부할 때 이미지 미리보기 기능을 구현하다가 막혀서 구글링 중에 찾은 포스팅인데
더 수정할 필요 없이 바로 사용해도 무리없는 소스를 발견하여 스크랩하여 둔다.

<html>
<head>
    <title></title>
    <style type="text/css">
        .preView { width: 70px; height: 70px; text-align: center; border:1px solid silver; }
    </style>
    <script type="text/javascript">

        function fileUploadPreview(thisObj, preViewer) {
            if(!/(\.gif|\.jpg|\.jpeg|\.png)$/i.test(thisObj.value)) {
                alert("이미지 형식의 파일을 선택하십시오");
                return;
            }

            preViewer = (typeof(preViewer) == "object") ? preViewer : document.getElementById(preViewer);
            var ua = window.navigator.userAgent;

            if (ua.indexOf("MSIE") > -1) {
                var img_path = "";
                if (thisObj.value.indexOf("\\fakepath\\") < 0) {
                    img_path = thisObj.value;
                } else {
                    thisObj.select();
                    var selectionRange = document.selection.createRange();
                    img_path = selectionRange.text.toString();
                    thisObj.blur();
                }
                preViewer.style.filter = "progid:DXImageTransform.Microsoft.AlphaImageLoader(src='fi" + "le://" + img_path + "', sizingMethod='scale')";
            } else {
                preViewer.innerHTML = "";
                var W = preViewer.offsetWidth;
                var H = preViewer.offsetHeight;
                var tmpImage = document.createElement("img");
                preViewer.appendChild(tmpImage);

                tmpImage.onerror = function () {
                    return preViewer.innerHTML = "";
                }

                tmpImage.onload = function () {
                    if (this.width > W) {
                        this.height = this.height / (this.width / W);
                        this.width = W;
                    }
                    if (this.height > H) {
                        this.width = this.width / (this.height / H);
                        this.height = H;
                    }
                }
                if (ua.indexOf("Firefox/3") > -1) {
                    var picData = thisObj.files.item(0).getAsDataURL();
                    tmpImage.src = picData;
                } else {
                    tmpImage.src = "file://" + thisObj.value;
                }
            }
        }

    </script>
</head>
<body>
    <input id="fileData" name="fileData" type="file" onchange="fileUploadPreview(this, 'preView')" />
    <div id="preView" class="preView" title="이미지미리보기"></div>
</body>
</html>

출처 : Junyong's blog - http://junyong.pe.kr/98

'Dev > Javascript' 카테고리의 다른 글

Prototype에서 jQuery로 옮겨타기  (0) 2011.07.31
Firebug의 console 파헤치기.  (0) 2011.07.19
fireBug 사용법  (0) 2011.07.19
[jQuery] firebug로 디버그  (0) 2011.07.19
Javascript 배열 메서드  (0) 2011.04.29

+ Recent posts